Last summer I made McCalls 6559
which fit me for about a week. After that, I gave it my niece to wear. This summer she returned it - she was "over stripes". I looked at it and thought, all it needs is about 4 extra inches in the side seam for it to fit me without standing straight and sucking it in - which you know only happens for about 3 seconds in front of a mirror. So I cut off the bottom to make it shorter and inserted a godet in one sideseam with the fabric that I eliminated. I now have a new summer dress to wear to Kauai in a few weeks. You can see the godet on the right side of the photo. (For some reason I was having static issues at the hem.) Here's the front and back view.
My sewing has been a bit slow the past couple of weeks. My mom fell and broke her hip, so I've been going back and forth to the hospital everyday to cheer her on in her rehab and to just make sure she is being taken care of. (Only after her blood pressure kept going up, did I realize they were not giving her her blood pressure meds (I gave them her prescription list of meds when she was admitted - didn't think I needed to check their list), and then it took 2 days to get the doc to put it back on their list, but that's another rant.) My mom gets to go home saturday where I will spend another couple of days with her and my dad to get her situated and comfortable walking with her temporary walker at home). I think I will bring some fabric and patterns to cut out while I'm there.
I also managed to make the Sewing Workshop's West End Top which I think is more like a jacket/hoodie.
I used a ponte knit which seems to be perfect for this jacket. The front of the jacket is unfinished which I am not crazy about.
The band goes to the forward side seams and the hem on the front is unfinished. I continued the top stitching through this unfinished area to the zip. (I see I have a thread to trim.)
But I do think it is a cute jacket/hoodie that is very loose fitting.
The Sewing Workshop patterns have some nice instructions. I made a S/M.
Thursday, September 5, 2013
Thursday, August 29, 2013
French Jacket with Susan Khalje - Day 1
Earlier this month, I took a 5 day couture sewing class with Susan Khalje. I wanted to make a Chanel style jacket. There were 12 students in the class and it was hosted at an ASG member's home. (Yes, she had a very large nice home that fit all 12 students and their supplies nicely.) I showed up on time with my muslin prepared and ready work very hard and learn all I could.
The pattern I chose was Vogue 8804 because I liked the 3/4 sleeves and short length. I was going to omit the buttons and overlap and use centerfront coat hook closures. I quickly learned that it might be difficult (some said impossible) to make a Chanel jacket in 5 days and was discouraged and told I should make a regular jacket (with organza underlining). I wanted to learn how to make a Chanel jacket and was willing to go back to the hotel each night and work until midnight if I had. Then I learned that my pattern choice was not optimal due to the back darts and the grain of the sleeves. It was suggested I use Vogue 7975.
This meant I had to make an entirely new muslin and all I could think about is losing one of my 5 days working on a muslin. One of the other students loaned me her Vogue 7975 and another loaned me some muslin, and I quickly put together another muslin while Susan was fitting the muslins of the other students. (I don't have any photos of the new muslin because as you can imagine I was frantically working trying to get caught up.) I managed to get my new muslin done that morning, fitted that afternoon, stitch lines redrawn thread traced and ready to cut out my fashion fabric. Fortunately most of my fitting issues are pretty easy: taking in the bust, letting out in the hips, expanding the bicep of the sleeve, and some lengthening here and there. By the end of the day I was ready to cut my fashion fabric which I purchased about a year ago from Fabric Mart Fabrics. I managed to pin my pattern pieces to my fabric before the class ended on day 1. You can see my fabric on the floor in the hotel ready for cutting.
I had to match the plaids and line up the pattern pieces so that everything matched after sewn. I will cut the three piece sleeves out later because those needed matching and the plaid lines might change after a few more fittings. The main jacket pieces were roughly cut out using 2" seam allowances.
That evening I basted every stitch line. Each line/side basted is a separate piece of thread.
And also basted on the stitch line some silk organza to the shoulder/sleeve area of the 4 side jacket pieces. Susan said it was not necessary to do the entire armseye, just the upper portion.
The next day I was going to baste the jacket together for another fitting.
Crafting
While I search for trim for my Chanel/French Jacket I decided to take a break from garments and make a sewing machine cover. Inside the Fall issue of Stitch magazine there is a really cute sewing machine cover. I found the fabric as shown at a local-ish store in Laguna, California called Sewing Party. The cover has a cute patchwork spool of thread and some really cute sewing related fabric. It was fairly easy to sew up in a few hours (I had to read and re-read instructions a few times to figure out what they were talking about and still not sure I got it right, but it does look the same.) The cover is quilted with some simple lines and lined with white cotton muslin.
Can you see the "spool"?
I got some trim samples from Britex but am not excited about any of them. I've been scouring the internet looking for trim. If you have any suggestions on where to get trim for a Chanel/French style jacket let me know. I'm looking for something off white with maybe a little black and coffee colors.
Thursday, August 22, 2013
Where Has the Summer Gone.... Has it really been 3 months?
I cannot believe I haven't posted anything for almost 3 months! I think after the wedding dress I took a break and that break turned into 3 months. I have so much to catch up on.
First, the wedding gown, finished and the happy bride and groom. The dress was a success. It fit beautifully, stayed on and in place, and my niece looked beautiful. I did a full review of the dress PatternReview
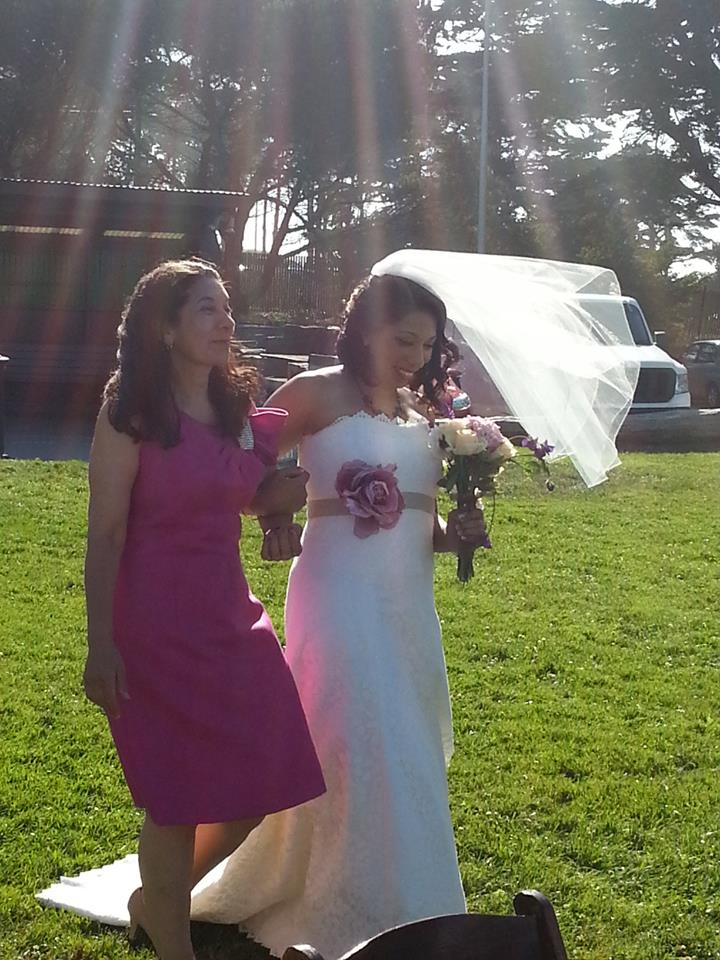
Here's the mother of the bride (sorry for the poor quality, and it was a windy day). The wedding ceremony was at the Presidio overlooking San Francisco Bay.
Both dresses were a challenge to work on. I am very happy with they way they turned out.
So you can see, I've still been sewing and churning out garments. I just recently returned from a 5 day Susan Khalje Couture class. My project was the Chanel/French jacket. ooo-la-la. I am now searching for the perfect trim. I took photos of the construction process and will be posting soon with lots of photos.. promise!
First, the wedding gown, finished and the happy bride and groom. The dress was a success. It fit beautifully, stayed on and in place, and my niece looked beautiful. I did a full review of the dress PatternReview
Here's the mother of the bride (sorry for the poor quality, and it was a windy day). The wedding ceremony was at the Presidio overlooking San Francisco Bay.
Both dresses were a challenge to work on. I am very happy with they way they turned out.
The following is a photo summary of what I've been working on these past couple of months
So you can see, I've still been sewing and churning out garments. I just recently returned from a 5 day Susan Khalje Couture class. My project was the Chanel/French jacket. ooo-la-la. I am now searching for the perfect trim. I took photos of the construction process and will be posting soon with lots of photos.. promise!
Wednesday, May 29, 2013
Huntington Library and Gardens, Pasadena, California
Warning: this is not sewing related......
I work in Pasadena at Caltech as does one of my sisters (I have three). About once a week, during our lunch hour, she and I go over to Huntington Library and Gardens to wander around . We like looking at the gardens and just being outside, however, today it was hot (and I was hungry and cranky and didn't really want to wander too much) so we went inside some of the gorgeous buildings to see some of the exhibits. Here's some photos
I thought these light bulbs were interesting
A view out one of the gallery windows
My sister and I
Friday, May 10, 2013
Mother of the Bride Dress Done
The Mother of the Bride dress is done! (well, except for the hook and eye at the top of the back zip).
Pattern Sizing: Sizes 42, 44, 46, and 48. I made size 46 which equates to about a size 8 in RTW "hips" and 14 in RTW "bust".
Did it look like the photo/drawing on the pattern envelope once you were done sewing with it? Yes. Yipee!
Were the instructions easy to follow? Instructions? There were no instructions. Only pattern. But the pattern was wonderful and the pieces fit perfectly. The entire process of this dress was 2 steps forward 1 step backwards. I'd do something, then realize I needed to do something else first, so had to rip out and re-do. For instance, I sewed the lining in before the zip and realized I needed to add the zip, at least before I sewed the lining to the neckline. It really helps to think about several steps at a time and how they all will fit together.
I first made a muslin and fitted it. I had to take a lot of fabric out of the bust as there was enough fabric for someone with at least a C cup. She was a large A/small B. I did this with 2 "dead" darts which are darts in the pattern, but not on the finished dress
Below is the original pattern
Some pleats and gathers had to be omitted when I removed fabric with the "dead" darts.
What did you particularly like or dislike about the pattern? I loved that it is a narrow sheath dress, the one shoulder, and the bling option. I originally looked at this pattern for myself, but then thought, how nice the mother of the bride would look in this walking her daughter down the aisle. This dress will not overwhelm the bride's dress, but my sister in law will be stunning on her own too. They will compliment each other.
The most difficult part of the dress was the draped shoulder. (And I thought that would be easy) Trying to figure out what was needed with only the picture and a couple of square shaped pattern pieces. I decided not to underline or line the drape so that it would fall nicely. There was also a piece that I assumed was for the back which the front part of the upper shoulder drape was to fit to. Here's an inside bodice view.
I did a lot of hand sewing on this dress and the drape and bodice to get it and the pleats just right. You can see some of my traced markings where I had to let the muslin out a bit. For this reason try to use tracing paper that is close to the color of your fabric, but still visible. However, on the bridal gown I used white on white... which was only visible at a certain angle, but that's another story.
That reminds me, I did have to raise the armholes about 1" as they were low.
I put the zipper in by hand. I thought about a side zip versus a back zip and went with the back because I felt there was already too much going on on the sides. After basting in the zip I used a small back stitch/pick stitch with double waxed thread to sew in the center zip. I still need to put a hook and eye at the top. Because of the angle of the back, there was no way to get the zip all the way to the top.
Fabric Used: I used silk jacquard for outer fabric; silk organza underlining, and china silk for the lining. I used the selvedge edge of the organza to stay the neckline.
Would you sew it again? Would you recommend it to others? I love this dress and would love to have an opportunity to make it for myself. If you fairly advanced this is a great dress. The dress itself is not too difficult and fairly basic, but the no instructions I feel makes it advance.
Conclusion: I am so happy with the way this dress turned out.
Monday, May 6, 2013
Simplicity 1651
My dress to my niece's wedding is DONE!
My review and all the details can be found here PatternReview
Subscribe to:
Posts (Atom)